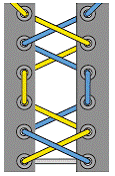
Forget taking your shoes to the cobbler! You can successfully perform basic shoe repairs at home. In this 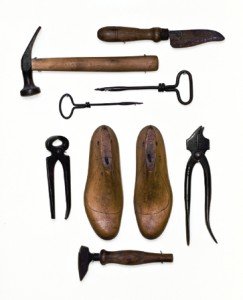 section you will learn how to save money and extend the life of your shoes with simple do-it-yourself repair techniques.You will discover how to:
• resole a shoe and attach a new heel
• stretch leather shoes
• adjust boots to fit your calves
• change the fit of athletic shoes with custom lacing
and much more! These repair methods are straightforward and fast. You do not have to be a craft whiz or expert handyman.
How to Adjust Boots to Fit Your Calves
How to Repair the Heel on an Athletic Shoe
- If your heel is slipping…
- If your foot is narrow…
- If your shoe feels too tight…
- If your shoe is putting pressure on your big toe…
- If your toes feel cramped…
- If the shoe rubs the top of your foot…
How to Resole a Shoe (Note 11)
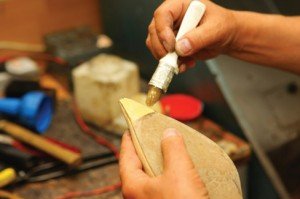
For some of us, shoes are sentimental possessions, and it is worth going the extra mile (and saving the extra dime) to make a simple shoe repair rather than looking for a replacement. One of the most common shoe repairs is resoling a shoe. Here is a brief summary of how you can perform this simple repair in the comfort of your home:
What You Need:
Shoe glue, replacement soles, razor, or utility knife, file.
Note: Choose half-soles for shoes with elevated heels and full-soles for
shoes with a flat sole. You can also purchase foam material and make
your own replacement soles.
• Step 1. Clean the old soles of your shoes. Remove all gunk, grime, and dirt. If you clean the soles with water, allow them to dry completely before you continue with the repair.
• Step 2. Use a razor or utility knife to cut away the old soles.
• Step 3. Use the file (or sandpaper) to scuff the surface of the shoe where the sole was removed and the surface of the replacement sole that will be attached to the scuffed surface of the shoe. This creates rough surfaces that will help the new sole adhere to the shoe.
• Step 4. This next step depends on the type of soles you purchased. Self-adhering soles can be carefully aligned with the bottom of the shoe and then attached. Soles that are not self-adhering will require some kind of shoe-repair contact cement. You should be able to find an appropriate product at your local shoe or hardware store.
• Step 5. The best way to reinforce the bond between the new soles and the old shoes is to walk around the house in them for several minutes.
• Step 6. Once the soles are firmly attached, use the utility knife to trim excess glue and leather. Use the file on the edges to give your new soles a smooth finish. If your shoes also need a pair of new heels, then you will need to attach half-soles and replace the heel separately. Please read ahead to learn how to equip your old shoes with new heels.
Note 11: Many shoes have molded unitary outsoles made of synthetic material and bonded to the uppers. It is often impractical to replace the soles of such shoes. In any event, resoling such shoes is best left to professional cobblers. The described methods for replacing soles and heels are for shoes made by the traditional method of gluing, sewing, and nailing pieces of rubber and leather.
| Back to top | Back to Table of Contents |
A shoe’s heel is often the first part of the shoe to need replacing. Look for heel tips or caps for women’s shoes online or at your local shoe store. NewHeelTips.com carries heel tips in a wide range of sizes and shapes. The Web site has printable templates that allow you to determine the size and shape to order based on your worn-out heel tips, and illustrated instructions for removal of your old heel tips and installation of the new.
These replacement heel tips come with a screw or nail already inserted. The only tool required for the job is a pair of pliers to remove the old heel tips. The nails of the new heel tips are inserted into the heels and are secured to the shoe by tapping them against a hard surface. For men’s shoes, you may use the following procedure to replace the heels:
What You Need:
Shoe glue, replacement heels, file, shoe nails or screws, and a hammer or screwdriver
What You Do:
• Step 1. Remove any nails or screws that are used to keep the old heel in place. The old heel should come off with a few forceful tugs. Do not worry if you break the old heel in the process of removing it.
• Step 2. Use the file (or sandpaper) to scuff the area of the shoe where the new heel will be attached and the surface of the replacement heel that will butt against that area of the shoe. This is your chance to remove any glue or gunk and to repair the leather.
• Step 3. Apply shoe-repair contact cement to the area on the shoe where you will attach the heel. Carefully line up the replacement heel. Press the heel firmly to the shoe.
• Step 4. Once the glue has dried, reinforce the new heel with several nails or screws. Use the old heel as your guide. Be careful not to apply nails or screws too close to the edge of the heel as this will weaken the heel and make it more likely to break.
• Step 5. Use a file to remove any rough edges or glue residue.
| Back to top | Back to Table of Contents |
| Back to top | Back to Table of Contents |
Method #1 (For REALLY cool shoes)
Use this creative method to stretch leather shoes
What You Need:
Two Ziploc® (or similar) bags, water, and a freezer
What You Do:
• Step 1. Fill each Ziploc® bag 1/3 full of water. Be sure to seal the bags completely!
• Step 2. Place each bag in the area of the shoe you want to stretch. Most often this is the forefront of the shoe, or the toe-box. You will want to make sure that the bag fills up all excess space. Add more water, if necessary. If the shoe has an open toe, pull the bag slightly through the toe so that it pokes out the other side.
• Step 3. Put your shoes in the freezer.
• Step 4. Allow the water to freeze completely so that each bag is full of ice. Water, as you may remember from your elementary school
science class, expands when frozen. The expansion of the water molecules will permanently stretch the leather of your shoes.
• Step 5. Once the bags are frozen solid, remove the shoes from the freezer and let them thaw for 20 minutes. Wipe off excess water, and try the shoes on for size. This method of stretching should be able to increase shoe size by a half to a full size.
| Back to top | Back to Table of Contents |
Method #2
This method results in minimal stretching, but, unlike the ice method, it offers a custom fit.
What You Need:
Rubbing alcohol, water, and a spray bottle
What You Do:
• Step 1. Mix 1 part isopropyl rubbing alcohol with 3 parts water. Pour this mixture into a spray bottle.
• Step 2. Test this mixture on a small, discreet area of the shoe. Allow it to dry. Only continue to Step 3 if the mixture does not alter the shoe’s finish.
• Step 3. Put on your shoes. Spray the mixture on areas of the shoe that feel tight.
• Step 4. Continue to wear the shoes until they are completely dry.
Tip
These methods works best on real leather shoes. Plastic or faux leather shoes may shrink back to their original size. No matter which approach you take, it is a good idea to treat your shoes first with a leather moisturizer. If the leather is extra soft and supple, it will not crack when stretched. Feel free to use a simple conditioner such as petroleum jelly or saddle soap. Professional cobblers use a “shoe stretching” spray before stretching leather shoes. You can purchase such a product online or in most up-market shoe stores.
| Back to top | Back to Table of Contents |
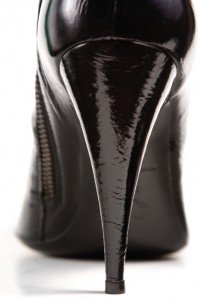
We all know that high heels are bad for our feet, ankles, knees, and posture. The list goes on! But that does not seem to stop us from wearing them. Pain may equal beauty in the short term, but at what price?
The good news is that lowering a heel by something even as subtle as 1/4 inch can relieve a tremendous amount of pressure on our feet, ankles, and knees. But alterations must be done carefully. If you lower the heel too much, you could distort the balance of the shoe. (Imagine a high heel shoe without its heel. The toe would point straight up into the air. At best, the shoe would be extremely uncomfortable. At worst, the shank would snap in two as soon as you put any weight on it.)
The Table Test
Here is an easy way of judging how much height a cobbler can take off a heel without distorting the shoe’s fit. Take your high heeled shoe or boot and place it on the end of a table so that the heel hangs off. Be sure to keep the shoe level. Slowly lower the heel until the back end of the ball of the foot rests on the table. Whatever part of the heel hangs below table-level is expendable.
Be warned: It is rarely possible to shorten a heel by more than an inch, and even this reduction is too much in some cases. A 3-inch stiletto cannot magically transform into a flat.
A confident craftsperson could attempt to saw off the excess height and then attach a heel following the procedure found above. However, this repair is best performed by an expert. Visit your friendly cobbler or shoe salesman for more information.
| Back to top | Back to Table of Contents |
How to Adjust Boots to Fit Your Calves
There are few things more disappointing than finding a pair of stylish boots that fit your feet perfectly but not your calves. Unfortunately, altering these boots can be costly. Before paying a cobbler to fix boots that cost you a pretty penny in the first place, consider these alternatives.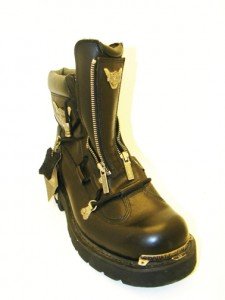
• Be Style Smart. Look for boots with straps, laces or buckles that allow you to cinch or loosen the leather for a fit that is perfectly suited to your body. Ruched boots (think: gathered leather) offer a flexible fit. For shoppers with skinny legs, these boots fit loosely without looking like your leg is drowning in leather. For shoppers with more shapely calves, ruched boots give you a little extra wiggle room.
• Buy Boots That Will Stretch. Look for boots made out of soft, stretchable leather. Sometimes a tight boot will loosen after a few wears. You can also purchase leather-stretching spray at most shoe stores, or check out creative ways to stretch leather shoes above.
• Modify Your Wardrobe. If you fall in love with a pair of boots that are too big around your calves, consider wearing them over pants or with thick socks. Tight boots can be worn with dresses and sheer nylons.
When all else fails, it is time for a visit to your friendly neighborhood cobbler. Cobblers can make tight boots bigger by adding elastic gussets. It is a little trickier to take-in big boots. The possibility of such an alteration will depend entirely on the way the boots are made. Ask your cobbler for details.
Be sure to tell the cobbler exactly how you intend to wear the boots to ensure a precise, custom fit! Don’t have the boot altered to fit your bare leg if you plan to wear the boot with jeans.
| Back to top | Back to Table of Contents |
Snapshot: Shoe Goo®
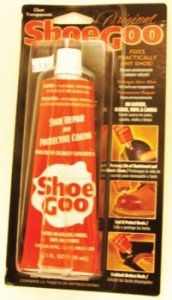
Shoe Goo® is an industrial strength urethane rubber cement (Note 12) that may be exactly what you are looking for when it comes to repairing your old shoes.
History
Invented in 1972, Shoe Goo® was originally designed to combat a problem known as “tennis toe.” The clear gummy glue was applied to the toes of tennis shoes that had been worn down by dragging the shoes across the tennis court.
What Can You Do with Shoe Goo®? Repairs in 5 minutes or less! Repair a Hole in the Sole of Your Shoe!
• Step 1. Remove the shoe’s insole.
• Step 2. Use a piece of duct tape to cover the hole from the inside. This tape will prevent Shoe Goo® from forming a bump on the inside of your shoe as the glue dries.
• Step 3. Apply Shoe Goo® to the outside of the shoe. Use enough glue so that the hole is completely filled.
• Step 4. Allow the glue to dry 24 hours before wearing the shoe. Be sure to take the tape off in under 2 hours or it may become a permanent feature of the shoe!
Repair a rip in the fabric of your shoe!
• Step 1. Apply Shoe Goo® to both sides of the tear.
• Step 2. Wait several moments until the glue becomes tacky, and then
firmly press the two ends in place.
• Step 3. Hold the ends in place for several minutes.
• Step 4. Allow the glue to dry. Apply another coat of Shoe Goo®, if necessary.
Re-finish a worn-down section of your shoe!
• Step 1. Coat the shoe in a thin layer of adhesive.
• Step 2. Allow the layer to dry before applying successive layers.
Note 12: FreeSole® Urethane Formula Shoe Repair is similar to Shoe Goo® and may be used instead.
| Back to top | Back to Table of Contents |
How to Repair the Heel on an Athletic Shoe
As any runner will tell you, most running shoes wear quickly and unevenly. This means that although your high-tech EVA midsole may have plenty of bounce left in it, the traction on the outer sole may have worn away. Or vice versa. One of the most common places running shoes
wear down is on the inside of the shoe’s heel. The fabric of the shoe wears away so that the plastic heel counter is exposed.
There are several ways to patch up this problem, each requiring varying levels of expertise and maintenance.
| Back to top | Back to Table of Contents |
Method #1: The Quick Fix
The easiest way to fix an exposed heel counter is to slap a piece of duct tape over the tear in the fabric. The tape should last for several runs and can be replaced easily.
| Back to top | Back to Table of Contents |
Method #2: The Do-It-Yourself Cobbler
The more labor-intensive approach is to use a piece of cloth. Look for material that is slippery yet durable. You want a fabric that will move with the motion of your heel. Nylon is a good choice, but be careful that the glue does not soak through the nylon and make the fabric hard. Other recommendations include denim, leather, and suede.
Tip
Look for an old jacket at a thrift store and use the leather elbow patches to reline the back of your shoe. Once you have chosen your fabric, you are ready to patch your shoe.
• Step 1. Cut out a patch that is substantially larger than the size of the hole.
• Step 2. Remove the shoe’s insole
• Step 3. Use a strong but flexible glue (Shoe Goo® or Gorilla Super Glue® (Note 13)) to glue the patch in place.
• Step 4. If you are feeling ambitious, stitch the patch to the shoe. Stitching and gluing the patch will make the patch last longer.
• Step 5. Replace the shoe’s insole.
Note 13: Gorilla Super Glue® is a cyanoacrylate glue mixed with tiny rubber particles to add flexibility. Any cyanocrylate glue should be used with extreme caution because it instantly bonds to the skin.
| Back to top | Back to Table of Contents |
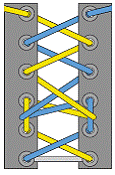
Shoe tying may seem like elementary stuff. But believe it or not, you can put your shoe tying skills to serious work. With a little ingenuity, the fit of athletic shoes can be modified simply by adjusting the way you tie your laces.
For more information about fun shoe tying methods, check out Ian Fieggen’s book Laces: 100s of Ways to Pimp Your Kicks or his shoelace site at www.fieggen.com/shoelace. (Note 14)
Note 14: Illustrations Copyright © 2003-2009 by Ian Fieggen; used with permission.
| Back to top | Back to Table of Contents |
Try tying your laces in a “lace lock.” This will allow you to tighten the laces around the ankle, which will help to secure your heel.
• Step 1. Lace your shoes normally, leaving the eyelet closest to the ankle open.
• Step 2. Take the right tail and thread it through the right eyelet so that the lace moves from the outside of the shoe to the inside. Do the same on the left side. Do not pull the lace all the way through! You want to create a loop just big enough for your little finger.
• Step 3. Once you have your two loops, take the laces and cross them. Now thread the tails through the two loops you created. Thread the left tail through the right loop, and the right tail through the left loop.
• Step 4. You are now ready to tie a normal bow. You should be able to tighten the laces at the ankle without tightening the entire shoe.
| Back to top | Back to Table of Contents |
You can also use the lace lock to tighten the forefoot of your athletic shoes. This is particularly helpful for people with narrow feet.
• Step 1. Start to lace your shoes normally. Stop as soon as you complete the “X” through the second eyelet. This is where you will apply the lace lock.
• Step 2. Take the tail of the lace that extends from the second eyelet on the right side of the shoe and thread it through the third eyelet on the right side of the shoe. Do the same on the left side. Don’t pull the laces all the way through! Make two small loops.
• Step 3. Once you have your two loops, cross the laces. Thread the left tail through the right loop and the right tail through the left loop. You’ve now created a lace lock that will enable you to cinch your shoe tightly at the forefront of your foot.
• Step 4. Continue lacing as normal. If your feet are extremely narrow,
you can use an additional lace lock at the ankle.
| Back to top | Back to Table of Contents |
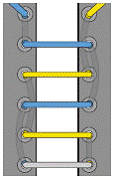
People with wide feet or high arches sometimes find athletic shoes to be too constricting. Solve this problem by using a parallel lacing technique.
• Step 1. To make this explanation clearer, let’s imagine that we are lacing the right shoe. Start by threading the lace through the first and second eyelets on the left side of the shoe. (This is the big toe side of the shoe.) The two tails should end up dangling outside the shoe.
• Step 2. Take the upper tail and cross to the right side of the shoe. Thread the lace through the first eyelet on the right side. The lace should move from the outside of the shoe to the inside of the shoe.
• Step 3. Thread this same tail through the third eyelet on the right side. (Notice we skipped one eyelet!) The lace should move from the inside of the shoe to the outside of the shoe.
• Step 4. Repeat this pattern using the same tail. (Thread the lace through the eyelet directly across the tongue. Then thread the lace through the eyelet on the same side, skipping one eyelet.)
• Step 5. Once you have reached the tongue, repeat the procedure with the other tail.
| Back to top | Back to Table of Contents |
If your shoe is putting pressure on your big toe…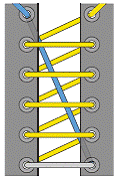
Often athletic shoes put unwanted pressure on the big toe. This can cause capillaries behind the toenail to burst, resulting in what is commonly referred to as a “black toenail.” To address this problem, use a lacing technique that enables you to pull the fabric of the upper away from the big toe.
• Step 1. Thread the lace through the eyelet closest to the big toe.
• Step 2. Take the inside end of the lace and thread it through the eyelet furthest away from the big toe. This will be the eyelet on the opposite side of the shoe closest to the ankle.
• Step 3. Pull the lace so that the majority of the slack is up by the big toe. (The lace near the ankle only needs to be long enough to tie a bow.)
• Step 4. Lace the entire shoe using the end of the lace that is next to the big toe. Thread the lace through the eyelet directly across from it. Then thread the lace through the eyelet that is diagonally up one eyelet. For example, if your tail is protruding through the second eyelet on the right side, thread it through the third eyelet on the left side. Repeat this pattern—across and then diagonally up—until you have completed the entire shoe.
• Step 5. Before tying the bow, tug on the lace that is opposite from the big toe (i.e., the tail that you did not lace the shoe with). You should be able to lift the fabric of the upper off of the toe, relieving the pressure.
| Back to top | Back to Table of Contents |
If your shoes only feel tight around the toes, lace your shoes with two laces that are shorter than the normal length. (Note 15)
• Step 1. Using the first lace, lace the first three eyelets as you normally would and tie a bow.
• Step 2. With the second lace, lace up the rest of the shoe and tie a second bow. This technique allows you to tie a loose bow near the toes while maintaining a tight fit around the ankle.
Note: A less esthetically pleasing solution may be to eliminate the lower lace entirely, only lacing the upper eyelets.
Note 15: The length depends on the number of pairs of eyelets engaged by the laces, and the distance between eyelets both across the shoe and vertically.
| Back to top | Back to Table of Contents |
If the shoe rubs the top of your foot…
Sometimes the fabric of the upper can rub the top of your foot raw. If you are suffering from this problem, try this simple technique.
• Step 1. Lace your shoe normally, but skip the eyelets in the area where your foot is most sore. Without laces cinched over the sore area, irritation should decrease.
Note: You should be able to skip a couple of eyelets without compromising the fit of your shoes. For best results, do not skip two eyelets in a row.
| Back to top | Back to Table of Contents |
Go to CHAPTER 9 – What to Do with Old Shoes
