Additional Care for Athletic Shoes
- How to Clean Leather Shoes
- How to Condition Leather Shoes
- How to Polish Leather Shoes
- How to Waterproof Leather Shoes
- How to Store Athletic Shoes
- Caring for Special Types of Shoes
How to Safely Break in a Pair of Shoes
Good shoes are expensive but worth the investment. In this section, you will learn ways to extend the life of your shoes by caring for them properly.
You will discover how to:
• properly clean and care for your athletic shoes
• clean, condition, polish, and waterproof your leather shoes
• remove scuff marks
• break-in a pair of stiff shoes
and much more! The goal is to keep your shoes looking and feeling great for longer—at last something that makes your feet and your wallet happy.
How to Clean Athletic Shoes
No matter how clean you keep your feet, athletic shoes start to smell after a while. And no wonder! With thousands of sweat glands, your feet are one of the sweatiest parts of your body. All this sweat attracts bacteria. When you get a whiff of a pungent pair of shoes, it is actually the bacteria’s excrement you are smelling. If that doesn’t convince you to clean your athletic shoes
from time to time, then I don’t know what will!
But before you jump the gun and throw your dirty sneakers into the washing machine, read the guidelines below. You will extend the life of your athletic shoes if you wash them by hand. A little extra effort helps your shoes go the distance.
What You Need:
Bucket, water, neutral cleaner, scrub brush or toothbrush, baking soda, and newspaper
What You Do:
• Step 1. Remove the laces and inserts
. These will be cleaned separately from the main body of the shoe.
• Step 2. Throw your laces into the washing machine along with a load of laundry. (Note: This is the only part of the shoe you will wash in the washing machine!) You can wash your laces
inside a mesh laundry bag (usually used for delicates), if you are worried about losing them in the wash. Pre-soak white laces
in bleach if they are really dirty.
• Step 3. Allow your inserts to air out in a well-ventilated area. If they smell, sprinkle the inserts
with baking soda.
• Step 4. Now it’s time to turn your attention to your shoes. Fill a bucket with soapy water. Be sure to use a neutral soap. Liquid dish detergent works well, but you can also use a gentle all-purpose cleaner such as Simple Green®. Allow your shoes to soak to loosen any tough stains.
• Step 5. For this next step, you will need a scrub brush and some elbow grease. Clean the shoes inside and out. Feel free to dig into those tough stains, but don’t scrub so hard that you ruin the fabric of the uppers. Use a toothbrush to tackle hard-to-reach stains in the shoes’ grooves and creases.
• Step 6. Rinse the shoes thoroughly. Soap residue will stiffen the fabric of the shoes.
• Step 7. The way you dry your shoes is just as important as the way you wash them. NEVER PUT SHOES IN THE DRYER. The extreme heat can change the shoes’ shape. Instead, allow your shoes to air dry. It helps to stuff newspaper inside the shoes to draw the moisture out. Old tennis shoes or canvas sneakers can sometimes be tossed into the washing machine with a load of towels. But for athletic shoes, hand washing is the way to go. Extra care will pay off in the long run. Your shoes (and feet) will thank you!
| Back to top | Back to Table of Contents |
Additional Care for athletic shoes
In addition to regularly cleaning your athletic shoes, there are several steps you can take to extend their life.
• Rotate your shoes regularly. Rotating your shoes is important for two reasons: it allows the shoes to dry completely between work-outs, and it gives the foam in a shoe’s sole time to decompress. (Every time you run or exercise, the supportive foam in your shoe’s sole compresses. Athletic shoes go flat once compressed foam loses its ability to bounce back.) Rotating two identical pairs of shoes is an especially good idea if you have found a pair of shoes you really like. Most running shoe
models are discontinued every 12-to-15 months. By purchasing two pairs at once, you extend the life of each pair and save yourself the hassle of trying out a new shoe. However, two pairs of shoes is only necessary if you run or workout more than four times a week.
• Untie your laces before removing your shoes. It is tempting to slip off athletic shoes
without untying the laces
, but this practice will gradually wear down the shoe’s heel counter.
• Use orthopedic inserts. A great way to make old shoes feel like new is to replace the shoe’s old insoles with new orthopedic insoles
available at most shoe stores and pharmacies.
• Sprinkle your shoes with baking soda to eliminate odor. A little baking soda goes a long way when it comes to absorbing moisture and eliminating foot odor. If you prefer a more high-tech approach, you can purchase anti-fungal deodorizing foot sprays.
| Back to top | Back to Table of Contents |
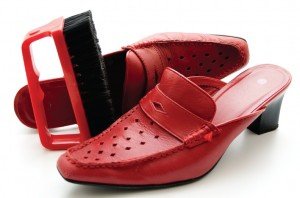
The full spectrum of caring for your leather shoes includes cleaning, conditioning, polishing, and waterproofing. It may sound like a lot of work, but once the basic materials are gathered you will find that the occasional maintenance your leather shoes require is well worth it. With proper care you can extend the life of your leather shoes by years.
| Back to top | Back to Table of Contents |
How to Clean Leather Shoes
Dust! Dust! Dust! Believe it or not, the most important thing you can do to preserve the life of your leather shoes is to keep them dust-free. When small grains of dust are allowed to accumulate on leather shoes, they cut into the leather with every step you take.
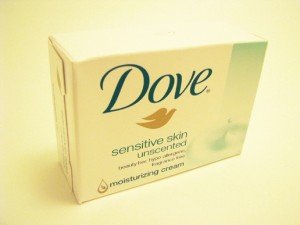
You don’t need anything special to wipe the dust off your leather shoes. Any dry or damp rag will do. Some people also like to use saddle soap or another moisturizing soap such as Dove. Apply the soap to the outside of the shoe. Be sure to wipe off the excess with a clean, dry cloth.
| Back to top | Back to Table of Contents |
How to Condition Leather Shoes
Over time leather shoes lose some of the natural oils that make them soft and pliable. This is especially true of leather shoes that are stored in warm, dry climates, or leather shoes that are polished with wax.
Choose a conditioner that is specific to the type of leather used to make your shoes. Be careful not to apply too much conditioner
; the conditioner
should soak into the leather without leaving your shoes feeling greasy. Wipe away any excess.
Note: You do not need to use a leather shoe conditioner if you use a conditioning soap, or regularly apply a paste
or cream
polish to your shoes. These products already function as conditioners.
| Back to top | Back to Table of Contents |
How to Polish Leather Shoes
When polishing leather shoes, you need to choose between four basic forms of shoe polish: cream, paste
, wax
, and liquid
. Most people recommend a cream
or paste
polish. These types of polishes perform wonders when it comes to concealing scratches or other blemishes in the leather. Cream
and paste
polishes soak into the leather, resulting in color that lasts. They also can act as conditioners
.
If you don’t want to use a cream or paste
polish, you have two options:
Use Wax Polish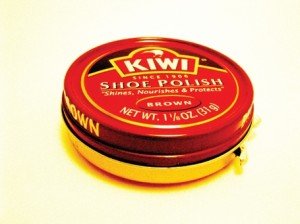
Use wax polish if your shoes are regularly exposed to the elements (rain, mud, etc.).
Pros: Wax polish offers extra protection for your shoes and a first-class shine.
Cons: Wax polish may dry out leather.
Use Liquid Polish
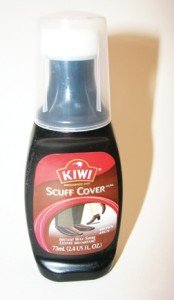
Use liquid polish if you want polish that will dry quickly.
Pros: Liquid polish can be applied quickly.
Cons: Liquid polish comes in fewer colors than other types of polish. It also does not last as long or cover imperfections as well as cream
and paste
polishes. Some people even claim that liquid polish
ruins leather.
What You Need:
Rag, soft-bristled shoe brush and your choice of shoe polish.
Note: Shoe polish can be applied either using a cloth or a brush. If you decide to use a brush, make sure that the bristles are soft and will not damage the leather. It is best to purchase a special “shoe shining” brush.
In order to polish your shoes properly, you will either need two brushes and one rag, or two rags.
What You Do:
• Step 1. The first step is to choose a polish that matches the the color of your shoes. Be sure to try the polish on a discreet area of the shoe before brushing it across the entire leather upper.
• Step 2. Take the first brush or rag and dip it into the polish. Firmly brush or rub the polish across the shoe, being careful to work the polish into the shoe’s crevices. Apply more polish as needed.
• Step 3. Once you have applied the polish, use a clean brush or rag to buff the shoe.
• Step 4. Step 4 is an optional step for those people who have decided to use brushes to polish their shoes. After buffing the polished shoe with a clean brush, give the shoe a final shine with a clean cloth.
Tip
Buffing your shoes with a clean brush or rag is absolutely essential; if you don’t remove the excess polish you will wind up with pant cuffs dyed to match your shoes!
| Back to top | Back to Table of Contents |
How to Waterproof Leather Shoes
Use wax or oil if your shoes are worn primarily outdoors (e.g., hiking boots), or if the shoe is made of a mixed material such as nylon and leather.
To Apply: Clean shoes first. Then apply the wax or oil with a cloth or brush.
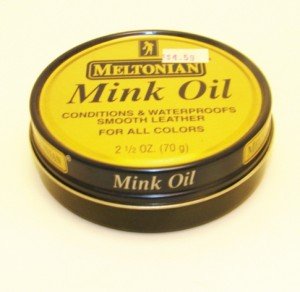 Be sure to work the product into the shoes’ creases. Wipe away the excess, and allow the shoes to stand overnight.
Warning: Waterproofing oils and waxes should never be applied to suede or nubuck as they will damage the quality of the leather.
Use a Waterproofing Spray
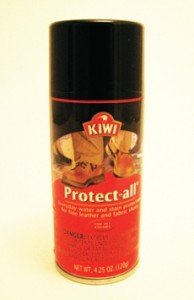
Use a waterproofing spray if your shoes are made of a more delicate leather, or if your climate is only mild to moderately wet.
To Apply: Clean the shoes first. Hold the spray 6 inches away from the shoes and apply an even coat. Allow the shoes to stand overnight.
Final word: Both methods have their advantages. Some waterproofing oils, such as mink oil, actually condition leather shoes. A waterproofing spray is without a doubt easier to apply. Ultimately, the decision comes down to the requirements of the specific leather used to make your shoes.
| Back to top | Back to Table of Contents |
How to Store Leather Shoes
The way you store your leather shoes is just as important as the way you clean and condition them.
Shoe trees can help maintain the shape of leather shoes when you are not wearing them. They are available in plastic and wood. Plastic shoe trees
are cheaper, but wooden ones (especially shoe trees
made out of cedar) help to absorb moisture and eliminate shoe odor. As is true with athletic shoes
, moisture shortens the lifespan of a pair of leather shoes. It causes the leather to decay, wrinkle and, of course, to smell.
There are two types of shoe trees: split and solid. Split shoe trees
are best for shoes made out of soft leather. They are designed to fit a variety of shoe widths. Solid shoe trees
work well for rigid leathers and shoes of average width.
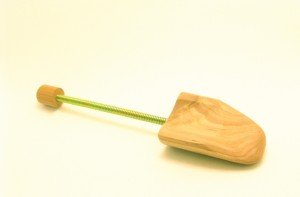 The picture to the left is an example of a solid shoe tree. A shoe tree with a split toe would have, as its name suggests, a wooden toe that was split into two pieces. You can adjust the distance between the two pieces to accommodate a variety of shoe widths.
Shoe trees come in a variety of sizes and shapes for both men’s and women’s shoes. They range in price from 15-to-20 dollars, and most customers find them to be well worth the investment.
| Back to top | Back to Table of Contents |
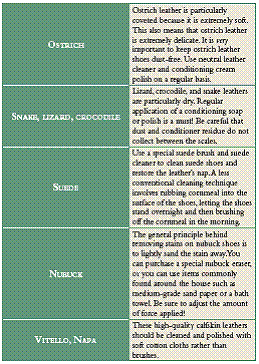
Caring for Special Types of Leather Shoes
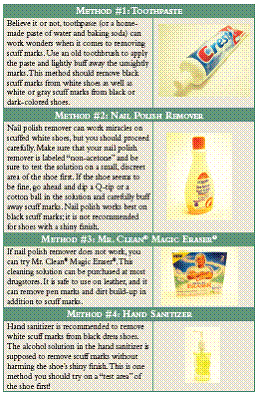
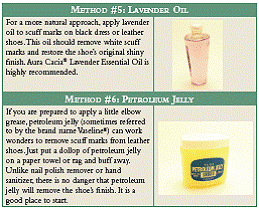
Six Tried and Trusted Methods for Removing Scuff Marks
Few things are more irritating than splurging on a new pair of shoes only to have them marred by scuff marks a few days later. Luckily, most scuff marks are removed easily.
Note: No matter what method you use, it is better to test it out on a small section of the shoe in a discreet area. The last thing you want is for your shoes to have scuff marks and a ruined finish!
| Back to top | Back to Table of Contents |
How to Safely Break in a Pair of Shoes
Whether you’ve purchased a pair of high heels or hiking boots, breaking in shoes can be a painful process. Unfortunately, there is no short-cut. The best way to break in stiff, stubborn shoes is simply to wear them.
That said, there is no need to take your new hiking boots on an 11-mile hike. Trying to do too much too soon in a pair of stiff shoes will leave you with little more than painful blisters and a lifelong distrust of your new fancy footwear. The key is to start slow. Here are three pain free methods that can get you on your way:
| Back to top | Back to Table of Contents |
Method #1: Movie Magic
Put on your new shoes and watch a movie. Simply wearing the shoes for sustained periods of time without walking in them will soften the shoes’ material.
| Back to top | Back to Table of Contents |
Method #2: Stairmaster
Wear your shoes every day for no more than to 15-to-30 minutes. Be sure to go up and down stairs, or do other activities that will force the shoes to bend and flex. The goal of this approach is to divide the break-in process into manageable and pain-free chunks. Take your shoes off immediately if you notice a hotspot.
| Back to top | Back to Table of Contents |
Method #3: Wet and Stretch
Put on your shoes and then use a spray bottle to target tight areas. Wear your shoes until they dry; they should end up better suited to the shape of your foot. To make this method even more effective use a mixture of 1 part rubbing alcohol and 3 parts water. Be sure to test the solution on a discreet area of the shoe first.
| Back to top | Back to Table of Contents |
Go to CHAPTER 8 – How to Repair Shoes
